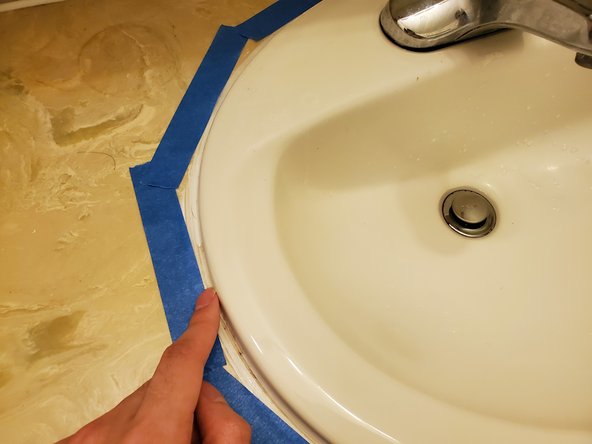
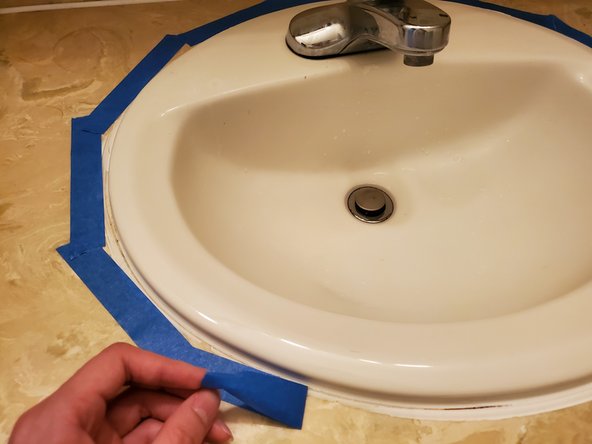
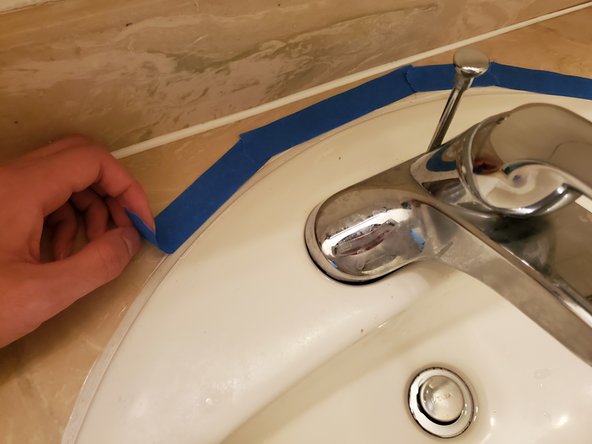
Salta al contenuto principale

How to re-caulk a bathroom sink

Cosa ti serve

  1. How to re-caulk a bathroom sink, Caulk seal: passo 1, immagine 1 di 1
    • Clean and dry around the rim of the sink with a paper towel.

    • Make sure the old caulk is completely dry before moving on.

  2. How to re-caulk a bathroom sink: passo 2, immagine 1 di 1
    • Remove the old caulk around the rim of the sink with a utility knife.

  3. How to re-caulk a bathroom sink: passo 3, immagine 1 di 1
    • Remove any old caulk residue around the rim of the sink with a wet paper towel.

    • Then dry the area completely.

    • Ensure the area is completely clean and dry before applying the new caulk.

  4. How to re-caulk a bathroom sink: passo 4, immagine 1 di 3 How to re-caulk a bathroom sink: passo 4, immagine 2 di 3 How to re-caulk a bathroom sink: passo 4, immagine 3 di 3
    • Apply painter's tape around the rim of the sink while leaving a small gap for caulk to be applied.

  5. How to re-caulk a bathroom sink: passo 5, immagine 1 di 2 How to re-caulk a bathroom sink: passo 5, immagine 2 di 2
    • Place the caulk tube into the gun.

    • Slowly press the trigger to release a thin line of caulk and move around the edge of the sink as you go.

  6. How to re-caulk a bathroom sink: passo 6, immagine 1 di 3 How to re-caulk a bathroom sink: passo 6, immagine 2 di 3 How to re-caulk a bathroom sink: passo 6, immagine 3 di 3
    • Smooth out the caulk against the edge of the rim and counter with your wet index finger.

    • Keep a rag nearby to wipe excess caulk from your finger periodically.

    • Press against the caulk firmly while sliding your index finger as you go around the rim of the sink.

  7. How to re-caulk a bathroom sink: passo 7, immagine 1 di 3 How to re-caulk a bathroom sink: passo 7, immagine 2 di 3 How to re-caulk a bathroom sink: passo 7, immagine 3 di 3
    • Pull the tape away from the counter immediately after applying the caulk.

    • Pulling away from the counter will help keep the caulk in a straight line.

  8. How to re-caulk a bathroom sink: passo 8, immagine 1 di 1
    • Wipe off any excess caulk from the edge of the rim with a wet paper towel.

  9. How to re-caulk a bathroom sink: passo 9, immagine 1 di 1
    • Let the new caulk dry for at least a day before using the sink.

Linea Traguardo

Un'altra persona ha completato questa guida.

Thi Nguyen

Membro da: 04/29/20

201 Reputazione

1 Guida realizzata

Team

0 Commenti

Aggiungi Commento

Visualizza Statistiche:

Ultime 24 Ore: 3

Ultimi 7 Giorni: 41

Ultimi 30 Giorni: 181

Tutti i Tempi: 4,819